Continental R Festoon lamp bulbs
My 1993 Continental R is lavishly illuminated by no fewer than 16 festoon bulbs:
| Roof | 4 |
| Footwell | 2 |
| Door | 2 |
| Map | 2 |
| Glovebox | 1 |
| Boot | 2 |
| Bonnet | 1 |
| Rear Registration Plate | 2 |
| Total | 16 |
Half of these are illuminated whenever a door is opened. This can lead to flat battery if one leaves door and boot open when working on the car. LED festoon bulbs are now available and offer two advanages over filament types: brighter, whiter light and lower electricity consumption.
 |
1. This shows the comparison between the original filament type's illumination (left) and the LED's output (right). |
I bought an initial package of 10 LED bulbs via EBay from Zonnex Digital of Bradford (info@zonnexdigital.co.uk), who shipped immediately (EBay item 252434663876). I measured the current consumption and found that the LED bulbs took 0.2 amps compared with 0.34 amps for the tungsten filament type.
There are three different designs of lampholder, but all take 36mm festoon bulbs. I bought "error-free" types, which are polarity-insensitive. It is possible that polarity-sensitive LEDs take less current than these, but would have to be fitted the right way around. The following account relates to a 1993 car. I cannot guarantee that yours will have identical arrangements. In particular, you should check the size of festoon bulbs fitted to your car, especially if you opt for the "error-free" types, as these have a heat sink which might short the lampholder terminals if too long a bulb were fitted.
The images on this page are clickable to reveal larger images in a new browser tab.
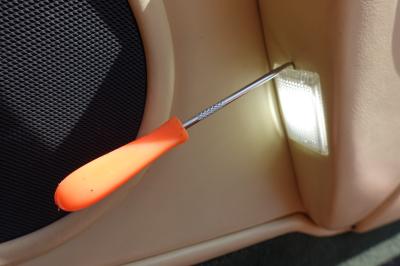
You will need a suitable tool to prise out the lampholders. I used a right-angled spike and small flat-bladed screwdriver, inserted into the notch at either end of the lampholder, having first run a finger-nail around the bezel to loosen any adhesion that may have occurred between lampholder and leather due to efflux of time or application of leather restorative.
Door lamps
These are easier to prise out than the roof lamps and, not having a decorative bezel, less liable to breakage, so it is as well to start with them.
Insert the tool at the top, as this should be the end which will come free; as the next picture shows, the connectors are at the other end. |
 |
 |
Here, the door lamp has been prised free. It is as well to remove one of the connectors before trying to remove the bulb, which will be hot.
This picture was taken after replacing the original bulb with the new LED one. |
| The bulb is held by a spring terminal, which makes removal and refitting a bit fiddly. (The roof lamps use a pair of spring clamps - see next pictures.)
Note that these "error-free" LED bulbs are backed by a heat sink. They do run quite warm. Most probably, the polarity-sensitive LED types consume less current than these; the downside is that you would need to determine the polarity of the lampholder terminals before fitting. |
 |
 |
Roof lamps
These lampholders are set in a decorative bezel that looks like chrome, but is actually very fragile plastic. The map lights (behind the sun visors) and boot interior lamps are of the same design. It may be as well to start with the boot lights, where a cracked bezel is not a disaster.
If you have strong fingernails and much determination, it may be possible to prise these lamps out sideways, as they do not come out easily from the ends. The bulb is held in place by a pair of Terry-type clips, which makes replacement easier than the longitudinal spring type of the door lamps.
Finally, ensure that bulb is placed centrally between the clips, to avoid the (slight) risk of shorting via the heat sink. |
Underbonnet lamp
This is covered by a glass dome, which is a push-fit into a rubber surround. Strong fingers and a little determination are the only tools needed. The bulb is a push-fit between short terminals - subtly different from the door lamp fitment, and less fiddly. |
Footwells
These assemblies are similar to the door lamps. |
Glovebox
This is also similar to the door lamps, but much easier to remove. |
Registration plate
I have not replaced these. |
Back
24 June 2017

