Continental R bonnet strut renewal
The Conti-R uses gas struts to support its very heavy bonnet. After a time, these lose some gas and become ineffective. I had mine regassed by SGS Engineering of Derby, though they advised me that they would probably leak down again, as the coating was worn.
I have now bought new ones, which arrived next day from SGS.
The pictures can be clicked to see larger versions for more detail.
This account relates to a 1993 car. Later models are likely to be similar, but I cannot guarantee that yours will be identical.
-
You will need a stout prop to hold the bonnet open and a lever to help remove the old struts. A small screwdriver may also be needed to ease the spring clip securing the sockets from their balls:
- The gas strut (this pic was taken after I had fitted the new one) is at the bottom right of this pic.
|

|

|
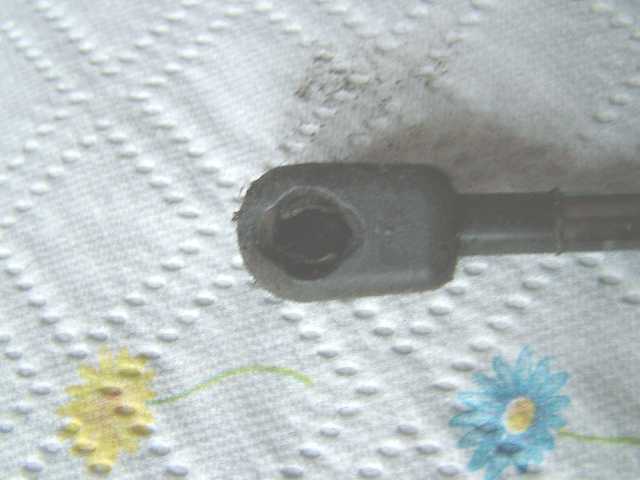
Here is a close-up.
|
The following pics show the old and the new struts. Note that the sockets are of different designs.
Below are the original sockets. They can be simply levered off, using a small screwdriver to ease the spring band from the back (RH pic). I found it easier to start with the top socket, which is more accessible than the bottom one.
If you are replacing with RR/B original equipment (part no UB 80182), refitting is simply a matter of pushing the new sockets on to their balls.
The SGS struts were supplied with chromed sockets, fitted with positive securing clips that must be removed to enable the socket to be clipped on.
I proceeded in the following sequence:
- lever off the top of the right-hand strut, then its bottom;
- remove the safety clip from the bottom socket of the SGS strut and set it aside;
- press the socket firmly on to the bottom ball;
- insert its safety clip and swing it around to secure it;
- repeat the process for the top of the strut;
- repeat 1 to 5 for the left-hand strut.
The safety clip for the top socket of the left-hand strut is the most fiddly to insert, because you cannot see the hole once the strut is in place. I managed to do it "blind" without dropping it, but you may prefer to use a mirror and a piece of dark cloth to catch the clip if you drop it.
Of course, if you buy new struts from RR/B, there are no fiddly little clips.
23 February 2011